Crafting Depth and Detail: A Guide to Creating Normal Maps in Photoshop
Related Articles: Crafting Depth and Detail: A Guide to Creating Normal Maps in Photoshop
Introduction
With great pleasure, we will explore the intriguing topic related to Crafting Depth and Detail: A Guide to Creating Normal Maps in Photoshop. Let’s weave interesting information and offer fresh perspectives to the readers.
Table of Content
Crafting Depth and Detail: A Guide to Creating Normal Maps in Photoshop
In the realm of 3D graphics and digital art, the ability to create convincing depth and texture is paramount. While traditional methods like bump mapping offer a rudimentary approach, normal maps provide a significantly more sophisticated solution, enabling artists to imbue their creations with unparalleled realism. This comprehensive guide will delve into the intricacies of generating normal maps in Adobe Photoshop, empowering you to elevate your digital artistry to new heights.
Understanding the Essence of Normal Maps
Normal maps are essentially grayscale images that encode surface direction information, guiding the rendering engine to simulate light and shadow interactions as if the surface possessed intricate detail. Each pixel in a normal map represents a vector pointing outwards from the surface, indicating its orientation relative to the viewer. This information allows the rendering engine to calculate how light reflects off the surface, creating the illusion of bumps, grooves, and other surface irregularities.
The Power of Normal Maps: Why They Matter
Normal maps offer a plethora of advantages over traditional methods, making them an indispensable tool for contemporary 3D artists:
- Enhanced Detail and Realism: Normal maps allow for the creation of highly detailed surfaces with minimal polygon count, significantly reducing rendering time and resource consumption.
- Flexibility and Control: Artists can easily adjust the intensity and direction of surface features, allowing for precise control over the final appearance.
- Efficient Workflow: Normal maps are relatively small in file size compared to high-resolution texture maps, facilitating faster loading and rendering.
- Versatility: Normal maps can be used for a wide range of applications, including game development, architectural visualization, and product design.
A Step-by-Step Guide to Normal Map Creation in Photoshop
Now, let us embark on the practical journey of creating normal maps in Photoshop. The process involves a series of steps, each contributing to the final outcome:
1. Preparing Your Source Image:
- High-Resolution Image: Begin with a high-resolution image that captures the desired surface detail. This could be a photograph, a 3D model render, or a custom illustration.
- Grayscale Conversion: Convert the image to grayscale mode. This step is crucial as normal maps are grayscale images.
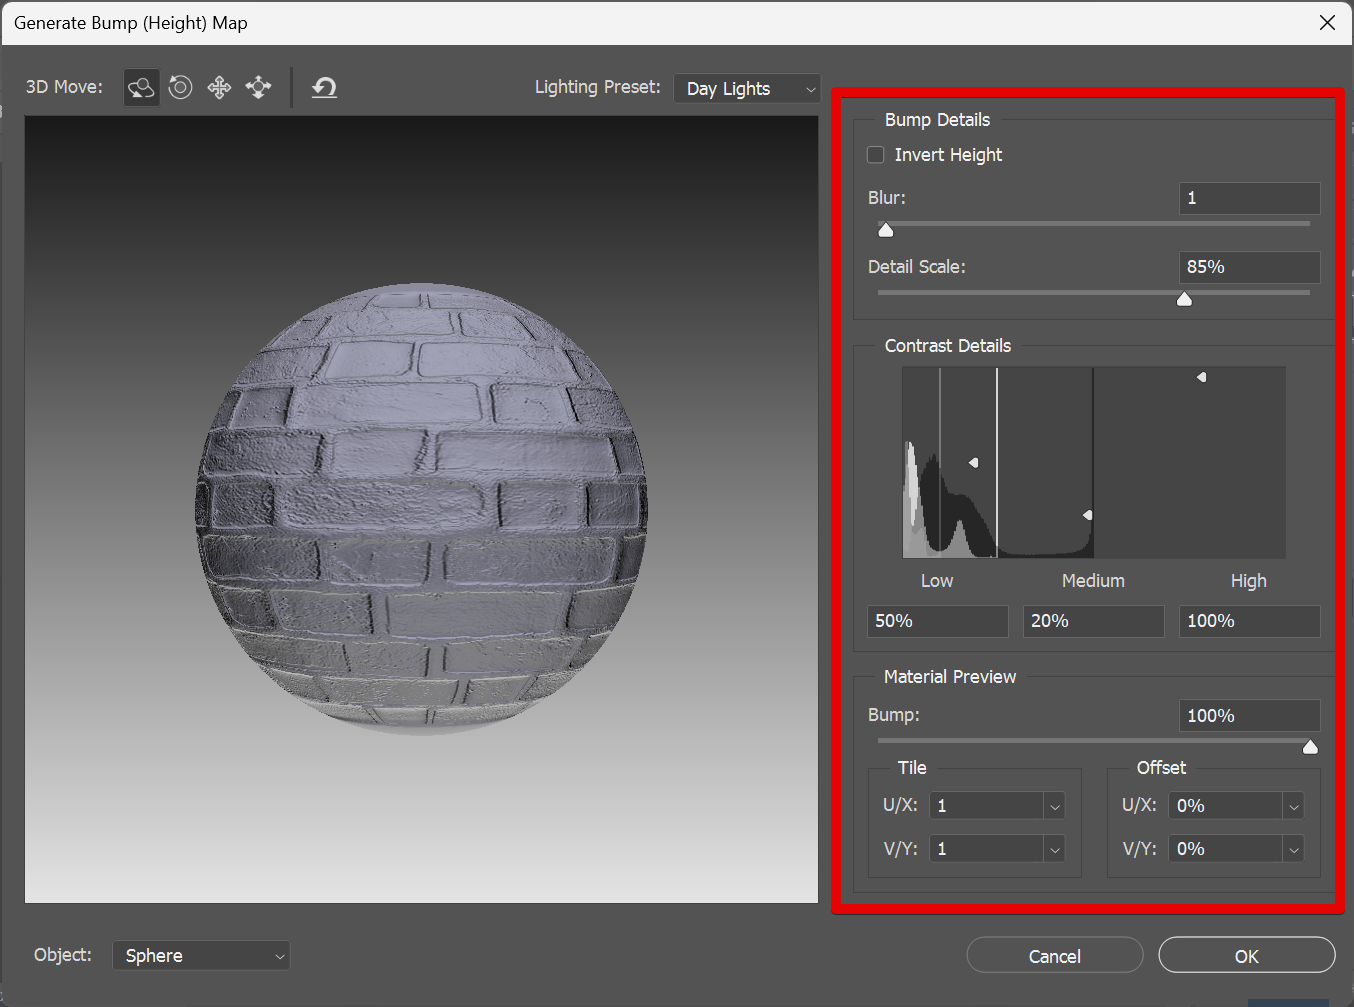
2. Creating the Height Map:
- Channel Mixer: Utilize the Channel Mixer to extract the desired detail from the grayscale image. Experiment with different channel combinations and levels to enhance the desired features.
- Levels Adjustment: Fine-tune the contrast and brightness of the height map using the Levels adjustment. This step ensures that the map effectively captures the surface variations.
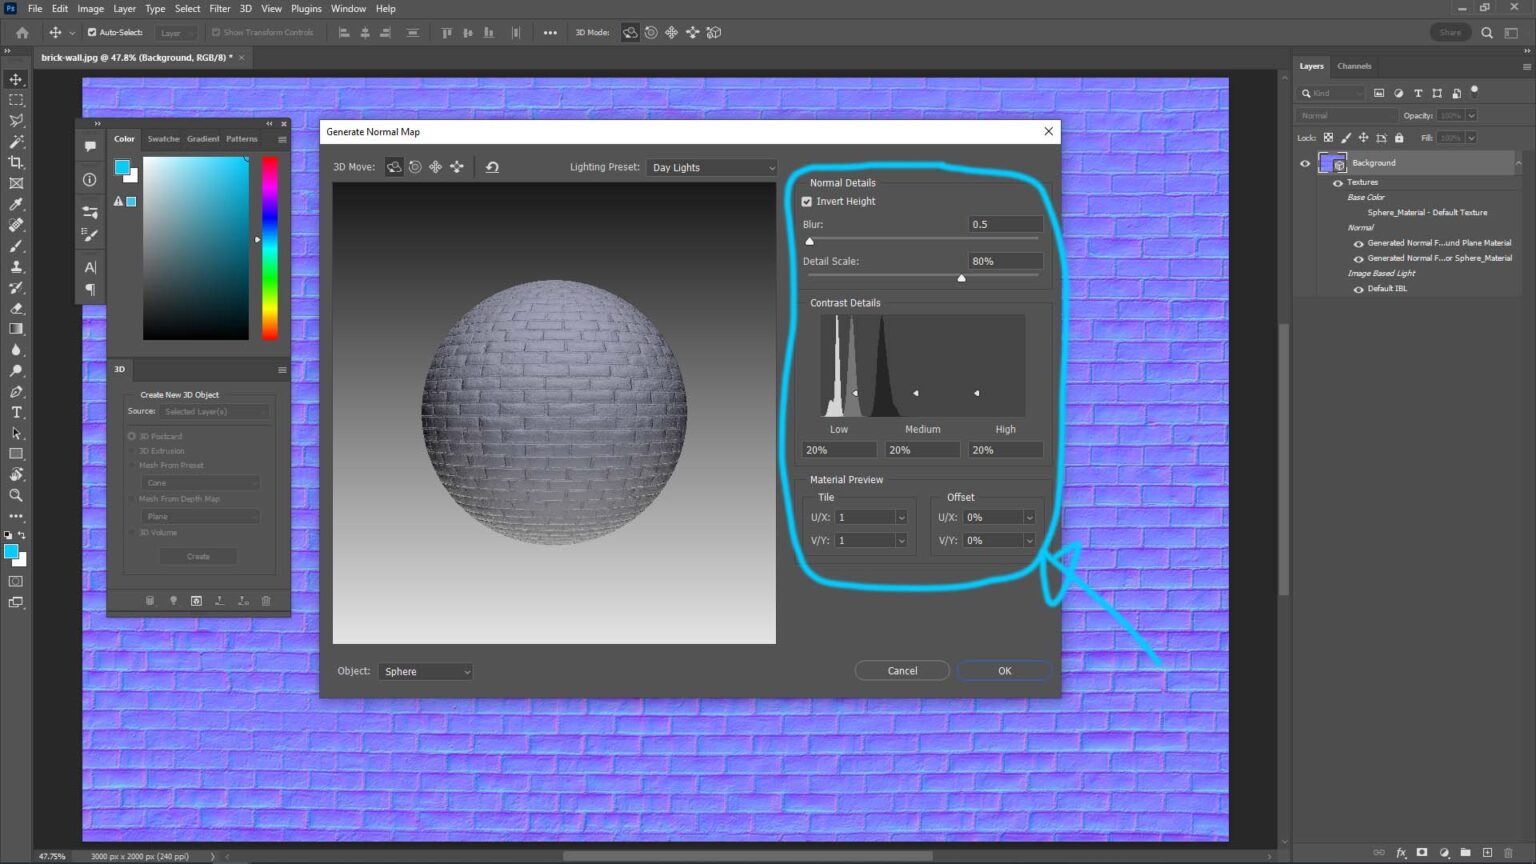
3. Generating the Normal Map:
- Filter Gallery: Access the Filter Gallery and navigate to the "3D" section. Choose the "Normal Map" filter.
-
Adjusting Parameters: The Normal Map filter offers several parameters that control the map’s appearance.
- Strength: Controls the intensity of the generated normal map. A higher strength value creates more pronounced surface details.
- Smoothness: Determines the level of smoothness in the generated map. A higher smoothness value produces a smoother, less detailed normal map.
- Inversion: Inverts the normal map, which can be useful for specific scenarios.
4. Fine-tuning and Optimization:
- Sharpening: Enhance the detail and sharpness of the normal map using sharpening filters, such as Unsharp Mask or Smart Sharpen.
- Color Correction: Adjust the color balance of the normal map using color correction tools. This step ensures that the map accurately reflects the desired surface characteristics.
- Saving: Save the final normal map in a format compatible with your 3D software, such as PNG or TGA.
Essential Tips for Creating Exceptional Normal Maps:
- High-Quality Source: The quality of the source image is paramount for generating a convincing normal map. Use high-resolution images with clear detail and good contrast.
- Experimentation: Do not hesitate to experiment with different filter settings and adjustments to achieve the desired level of detail and realism.
- Reference Images: Utilize reference images of real-world materials to guide your normal map creation.
- Dedicated Software: For advanced normal map creation, consider using dedicated software designed specifically for this purpose, such as Substance Painter or xNormal.
Frequently Asked Questions (FAQs)
Q: What are the common applications of normal maps?
A: Normal maps find widespread use in:
- Game Development: Creating detailed environments and characters with minimal polygon count.
- Architectural Visualization: Simulating realistic textures and surface imperfections in 3D models.
- Product Design: Rendering high-quality product visuals with intricate detail.
- Film and Television: Adding realism and depth to visual effects.
Q: What file formats are suitable for normal maps?
A: Commonly used formats for normal maps include:
- PNG: Offers lossless compression, preserving the detail of the map.
- TGA: Supports alpha channels, allowing for additional information to be encoded.
- BMP: A simple format that is compatible with various software.
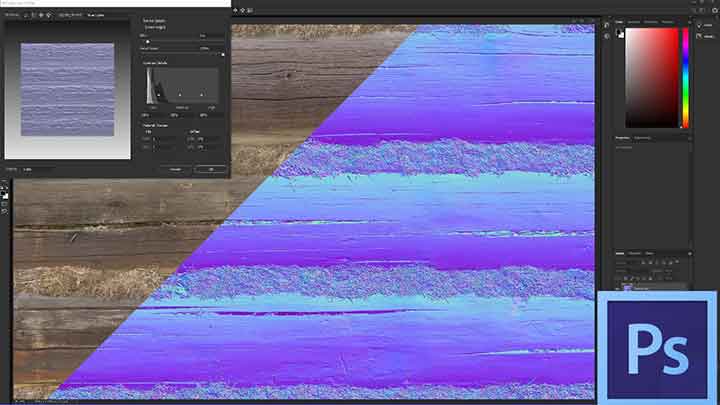
Q: Can I create normal maps from photographs?
A: Yes, you can create normal maps from photographs. By following the steps outlined in this guide, you can extract surface detail from photographs and generate a normal map that simulates the real-world texture.
Q: How can I enhance the detail of my normal map?
A: To enhance the detail of your normal map, consider:
- Sharpening: Apply sharpening filters to emphasize the subtle variations in the map.
- High-Pass Filtering: Use a high-pass filter to extract the edges and details from the map.
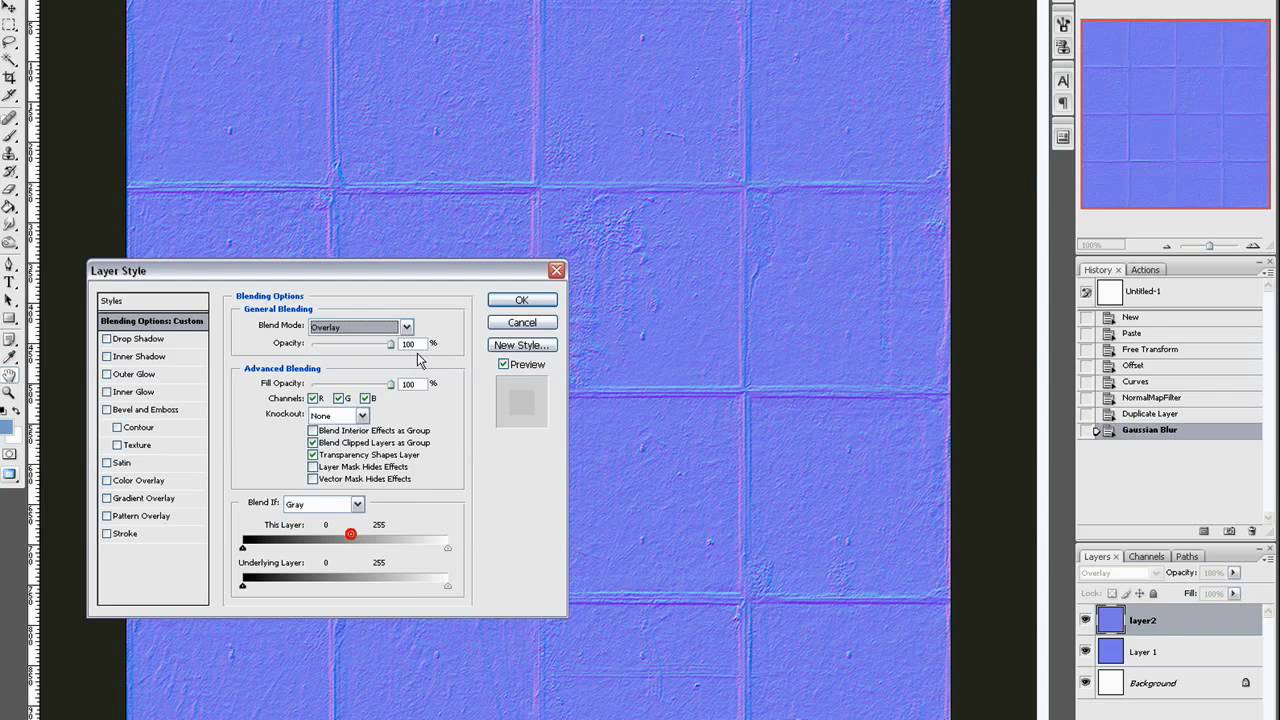
- Layer Blending Modes: Experiment with different layer blending modes to enhance specific features in the map.
Conclusion
Mastering the art of normal map creation in Photoshop empowers you to create compelling and realistic 3D graphics. By understanding the principles behind normal maps and diligently applying the techniques outlined in this guide, you can significantly elevate the visual quality of your digital creations. Remember, experimentation and a keen eye for detail are key to achieving exceptional results. Embrace the power of normal maps and unlock a new dimension of realism in your 3D artwork.


Closure
Thus, we hope this article has provided valuable insights into Crafting Depth and Detail: A Guide to Creating Normal Maps in Photoshop. We appreciate your attention to our article. See you in our next article!